色々なコンピューターリソースを監視する Zabbixを導入しましょう。
サーバー管理者ならその名をきっと聞いたことがあるはずです。
本家サイトはこちら。
ZABBIX
まだ世間では Ver.6が多いと思いますが、LTS版でメジャーバージョンアップした Ver.7 が出てますんで、これをインストールしたいと思います。
2024年12月21日時点では最新バージョンとして7.2が出ていますが、本運用を考えるとやっぱり LTSだと思いますので。
1.環境
このセットでいきます。
| 用途 | ソフト | バージョン |
|---|---|---|
| OS | Ubuntu Server | 24.04 |
| DB | MySQL | 8.4 |
| Webサーバー | NGiNX | 1.24.0 |
Ubuntu Server 24.04 のインストールについては「Ubuntu 24.04 Server インストール」に書いていて、その手順で仮想OSとして作っています。
MySQL 8.4のインストールについては「MySQLインストール」に書いていて、その手順で予めインストールしてあります。
2.インストール手順の表示
Zabbixのダウンロードページでは、対象のOS環境などを選択することでインストール手順を自動表示してくれるようになっています。
こちらのページです。
Download and install Zabbix
上記のサイトでこんな画面になります。
(上記URLは以下の選択をした際のものになっています。)
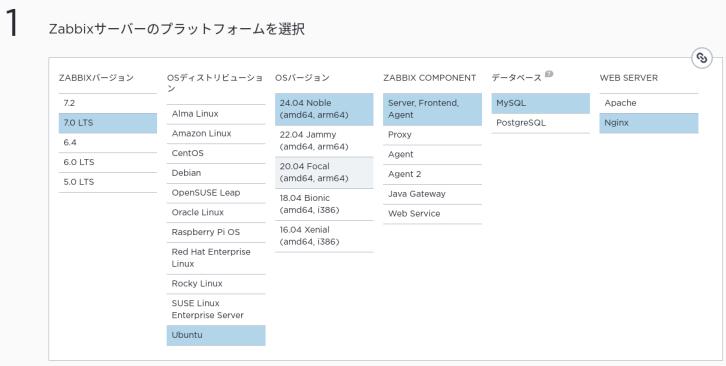
この画面で以下の通り対象を選ぶと、それに従ってインストールのためのコマンドが表示されるようになっています。
| ZABBIXバージョン | 7.0LTS |
| OSディストリビューション | Ubuntu |
| OSバージョン | 24.04 (Noble) |
| ZABBIX COMPONENT | Server, Frontend, Agnet |
| データベース | MySQL |
| Web Server | Nginx |
※どうやら MySQL/NGiNX/PHPなど結構他の OSSの環境を要求するようです。
インストール時に既存で入っているパッケージをアップデートしてしまう可能性があるので、Zabbixは他のサーバー機能と共存させず Zabbixオンリーの OS環境を用意したほうが良い気がします。
どうしても他の機能と相乗りさせるときは、Dockerを使ったほうが良いでしょう。
色々なタイプのイメージがこちらにあります。
Zabbix Docker Component Repositories
3.インストール
2のページを下に行くとインストール手順が出てきますので、それに従ってインストールをしていきます。
(root権限が必要なコマンドに sudoを使っています。)
a. Become root user の手順
[root]ユーザーにスイッチした状態のシェルを立ち上げています。
subro@UbuntuServer2404-1:~$ sudo -s

root@UbuntuServer2404-1:/home/subro#
b. Install Zabbix repository の手順
OSに Zabbixのパッケージリポジトリサイトを登録するためのパッケージをダウンロードします。
root@UbuntuServer2404-1:/home/subro# wget https://repo.zabbix.com/zabbix/7.0/ubuntu/pool/main/z/zabbix-release/zabbix-release_latest_7.0+ubuntu24.04_all.deb
--2024-12-16 20:52:40--  https://repo.zabbix.com/zabbix/7.0/ubuntu/pool/main/z/zabbix-release/zabbix-release_latest_7.0+ubuntu24.04_all.deb
repo.zabbix.com (repo.zabbix.com) をDNSに問いあわせています... 2604:a880:2:d0::2062:d001, 178.128.6.101
repo.zabbix.com (repo.zabbix.com)|2604:a880:2:d0::2062:d001|:443 に接続しています... 失敗しました: 接続を拒否されました.
repo.zabbix.com (repo.zabbix.com)|178.128.6.101|:443 に接続しています... 接続しました。
HTTP による接続要求を送信しました、応答を待っています... 200 OK
長さ: 8092 (7.9K) [application/octet-stream]
‘zabbix-release_latest_7.0+ubuntu24.04_all.deb’ に保存中

zabbix-release_latest_7.0+ubuntu24.04_all.deb    100%[======================>]   7.90K  --.-KB/s    in 0s

2024-12-16 20:52:40 (89.9 MB/s) - ‘zabbix-release_latest_7.0+ubuntu24.04_all.deb’ へ保存完了 [8092/8092]

root@UbuntuServer2404-1:/home/subro# ls -l zabbix-release_latest_7.0+ubuntu24.04_all.deb
-rw-r--r-- 1 root root 8092 11月 29 17:11 zabbix-release_latest_7.0+ubuntu24.04_all.deb
ダウンロードが完了して [zabbix-release_latest_7.0+ubuntu24.04_all.deb] というパッケージファイルができました。
これをインストールします。
root@UbuntuServer2404-1:/home/subro# dpkg -i zabbix-release_latest_7.0+ubuntu24.04_all.deb
以前に未選択のパッケージ zabbix-release を選択しています。
(データベースを読み込んでいます ... 現在 140688 個のファイルとディレクトリがインストールされています。)
zabbix-release_latest_7.0+ubuntu24.04_all.deb を展開する準備をしています ...
zabbix-release (1:7.0-2+ubuntu24.04) を展開しています...
zabbix-release (1:7.0-2+ubuntu24.04) を設定しています ...
インストールできました。
Zabbixがインストールされたんではなく、Zabbixのパッケージを置いてあるサイトの登録ができただけで、[/etc/apt/sources.list.d]ディレクトリに以下のファイルができたのでした。
root@UbuntuServer2404-1:/home/subro# ls -la /etc/apt/sources.list.d
合計 28
drwxr-xr-x 2 root root 4096 12月 16 20:56 .
drwxr-xr-x 9 root root 4096  4月 26  2024 ..
-rw-r--r-- 1 root root  650 12月  8 09:39 mysql.list
-rw-r--r-- 1 root root  386  4月 26  2024 ubuntu.sources
-rw-r--r-- 1 root root 2552  4月 23  2024 ubuntu.sources.curtin.orig
-rw-r--r-- 1 root root  173  5月 29  2023 zabbix-tools.list
-rw-r--r-- 1 root root  293  5月 29  2023 zabbix.list
登録された Zabbixのパッケージリポジトリにあるパッケージの情報を得ます。
root@UbuntuServer2404-1:/home/subro# apt update
ヒット:1 http://repo.mysql.com/apt/ubuntu noble InRelease
取得:2 https://repo.zabbix.com/zabbix-tools/debian-ubuntu noble InRelease [2,476 B]
ヒット:3 http://jp.archive.ubuntu.com/ubuntu noble InRelease
取得:4 https://repo.zabbix.com/zabbix/7.0/ubuntu noble InRelease [3,966 B]
取得:5 http://jp.archive.ubuntu.com/ubuntu noble-updates InRelease [126 kB]
取得:6 https://repo.zabbix.com/zabbix-tools/debian-ubuntu noble/main Sources [1,166 B]
取得:7 http://security.ubuntu.com/ubuntu noble-security InRelease [126 kB]
取得:8 https://repo.zabbix.com/zabbix-tools/debian-ubuntu noble/main all Packages [766 B]
取得:9 https://repo.zabbix.com/zabbix/7.0/ubuntu noble/main Sources [12.0 kB]
取得:10 https://repo.zabbix.com/zabbix/7.0/ubuntu noble/main amd64 Packages [22.6 kB]
取得:11 https://repo.zabbix.com/zabbix/7.0/ubuntu noble/main all Packages [4,985 B]
取得:12 http://jp.archive.ubuntu.com/ubuntu noble-backports InRelease [126 kB]
取得:13 http://jp.archive.ubuntu.com/ubuntu noble-updates/main amd64 Packages [725 kB]
取得:14 http://security.ubuntu.com/ubuntu noble-security/main amd64 Packages [538 kB]
取得:15 http://jp.archive.ubuntu.com/ubuntu noble-updates/main Translation-en [167 kB]
取得:16 http://jp.archive.ubuntu.com/ubuntu noble-updates/main amd64 Components [151 kB]
取得:17 http://jp.archive.ubuntu.com/ubuntu noble-updates/restricted amd64 Packages [537 kB]
取得:18 http://jp.archive.ubuntu.com/ubuntu noble-updates/restricted Translation-en [104 kB]
取得:19 http://jp.archive.ubuntu.com/ubuntu noble-updates/restricted amd64 Components [212 B]
取得:20 http://jp.archive.ubuntu.com/ubuntu noble-updates/universe amd64 Packages [926 kB]
取得:21 http://jp.archive.ubuntu.com/ubuntu noble-updates/universe Translation-en [230 kB]
取得:22 http://jp.archive.ubuntu.com/ubuntu noble-updates/universe amd64 Components [309 kB]
取得:23 http://jp.archive.ubuntu.com/ubuntu noble-updates/multiverse amd64 Components [940 B]
取得:24 http://jp.archive.ubuntu.com/ubuntu noble-backports/main amd64 Components [208 B]
取得:25 http://jp.archive.ubuntu.com/ubuntu noble-backports/restricted amd64 Components [216 B]
取得:26 http://jp.archive.ubuntu.com/ubuntu noble-backports/universe amd64 Components [11.7 kB]
取得:27 http://jp.archive.ubuntu.com/ubuntu noble-backports/multiverse amd64 Components [212 B]
取得:28 http://security.ubuntu.com/ubuntu noble-security/main Translation-en [107 kB]
取得:29 http://security.ubuntu.com/ubuntu noble-security/main amd64 Components [7,176 B]
取得:30 http://security.ubuntu.com/ubuntu noble-security/restricted amd64 Packages [525 kB]
取得:31 http://security.ubuntu.com/ubuntu noble-security/restricted Translation-en [102 kB]
取得:32 http://security.ubuntu.com/ubuntu noble-security/restricted amd64 Components [212 B]
取得:33 http://security.ubuntu.com/ubuntu noble-security/universe amd64 Packages [756 kB]
取得:34 http://security.ubuntu.com/ubuntu noble-security/universe Translation-en [161 kB]
取得:35 http://security.ubuntu.com/ubuntu noble-security/universe amd64 Components [51.9 kB]
取得:36 http://security.ubuntu.com/ubuntu noble-security/multiverse amd64 Components [212 B]
5,838 kB を 4秒 で取得しました (1,656 kB/s)
パッケージリストを読み込んでいます... 完了
依存関係ツリーを作成しています... 完了
状態情報を読み取っています... 完了
アップグレードできるパッケージが 21 個あります。表示するには 'apt list --upgradable' を実行してください。
情報を得られました。
この結果、次の作業をしたときに勝手に Zabbix本体のパッケージをダウンロードしてインストールしてくれるのです。
c. Install Zabbix server, frontend, agent の手順
Zabbix(その他)のパッケージをインストールします。
root@UbuntuServer2404-1:/home/subro# apt install -y zabbix-server-mysql zabbix-frontend-php zabbix-nginx-conf zabbix-sql-scripts zabbix-agent
パッケージリストを読み込んでいます... 完了
依存関係ツリーを作成しています... 完了

〜〜〜 長いので以下省略 〜〜〜
インストールできました。
d. Create initial database の手順
MySQLの中に Zabbix用のデータベースを作成します。
root@UbuntuServer2404-1:/home/subro# mysql -uroot -p
Enter password: MySQLをインストールした時の(MySQLの)[root]ユーザーのパスワード
Welcome to the MySQL monitor.  Commands end with ; or \g.
Your MySQL connection id is 10
Server version: 8.4.3 MySQL Community Server - GPL

Copyright (c) 2000, 2024, Oracle and/or its affiliates.

Oracle is a registered trademark of Oracle Corporation and/or its
affiliates. Other names may be trademarks of their respective
owners.

Type 'help;' or '\h' for help. Type '\c' to clear the current input statement.

[zabbix]データベースを作成します
mysql> create database zabbix character set utf8mb4 collate utf8mb4_bin;
Query OK, 1 row affected (0.00 sec)

[zabbix]ユーザーを作成します(パスワードはキツくしないといけないのでコレにしました)
mysql> create user zabbix@localhost identified by 'Subro38Manager-';
Query OK, 0 rows affected (0.01 sec)

[zabbix]ユーザーに[zabbix]データベースの全権限を付与します
mysql> grant all privileges on zabbix.* to zabbix@localhost;
Query OK, 0 rows affected (0.00 sec)

次に[zabbix]データベースの中身を作るためセキュリティをちょっと緩めます
mysql> set global log_bin_trust_function_creators = 1;
Query OK, 0 rows affected, 1 warning (0.00 sec)

一旦MySQLから抜けます
mysql> quit;
パッケージインストールでできた圧縮ファイルに [zabbix]データベースに作るテーブルなどの SQLが入ってますのでこれを流し込みます。
root@UbuntuServer2404-1:/home/subro# zcat /usr/share/zabbix-sql-scripts/mysql/server.sql.gz | mysql --default-character-set=utf8mb4 -uzabbix -p zabbix
Enter password: Subro38Manager- 上で作った(MySQLの)[zabbix]ユーザーのパスワード
ちょっと時間がかかって終わりました。
また MySQLにログインして、さっき緩めたセキュリティを元に戻します。
root@UbuntuServer2404-1:/home/subro# mysql -uroot -p
Enter password: MySQLをインストールした時の(MySQLの)[root]ユーザーのパスワード

mysql> set global log_bin_trust_function_creators = 0;
Query OK, 0 rows affected, 1 warning (0.00 sec)

mysql> quit;
これで良いでしょう。
e. Configure the database for Zabbix server の手順
Zabbixの設定ファイル [/etc/zabbix/zabbix_server.conf ] を編集して、MySQLにアクセスするために(MySQLの)[zabbix]ユーザーのパスワードを記載します。
# DBPassword=
  ↓
DBPassword=Subro38Manager-
f. Configure PHP for Zabbix frontend の手順
Nginxの設定ファイル [/etc/zabbix/nginx.conf] を編集して、WEBブラウザでアクセスするときの URLを記載します。
#        listen          8080;
#        server_name     example.com;
      ↓
        listen          8080;
        server_name     UbuntuServer2404-1.internal; ← 個々の環境で変えてください
g. Start Zabbix server and agent processes の手順
各種サービスを起動します。
root@UbuntuServer2404-1:/home/subro# systemctl restart zabbix-server zabbix-agent nginx php8.3-fpm
何も出ませんが、起動しています。
以降もOS起動時に自動起動するようにします。
root@UbuntuServer2404-1:/home/subro# systemctl enable zabbix-server zabbix-agent nginx php8.3-fpm
Synchronizing state of zabbix-server.service with SysV service script with /usr/lib/systemd/systemd-sysv-install.
Executing: /usr/lib/systemd/systemd-sysv-install enable zabbix-server
Synchronizing state of zabbix-agent.service with SysV service script with /usr/lib/systemd/systemd-sysv-install.
Executing: /usr/lib/systemd/systemd-sysv-install enable zabbix-agent
Synchronizing state of nginx.service with SysV service script with /usr/lib/systemd/systemd-sysv-install.
Executing: /usr/lib/systemd/systemd-sysv-install enable nginx
Synchronizing state of php8.3-fpm.service with SysV service script with /usr/lib/systemd/systemd-sysv-install.
Executing: /usr/lib/systemd/systemd-sysv-install enable php8.3-fpm
Created symlink /etc/systemd/system/multi-user.target.wants/zabbix-server.service → /usr/lib/systemd/system/zabbix-server.service.
良いようです。
これでインストールは完了です。
4.Zabbixの初期設定
私の環境での Zabbixの URLは以下になっているはずです。
[http://UbuntuServer2404-1:8080]
(私の Lubuntuでは [/etc/hosts]ファイルで名前解決しています)
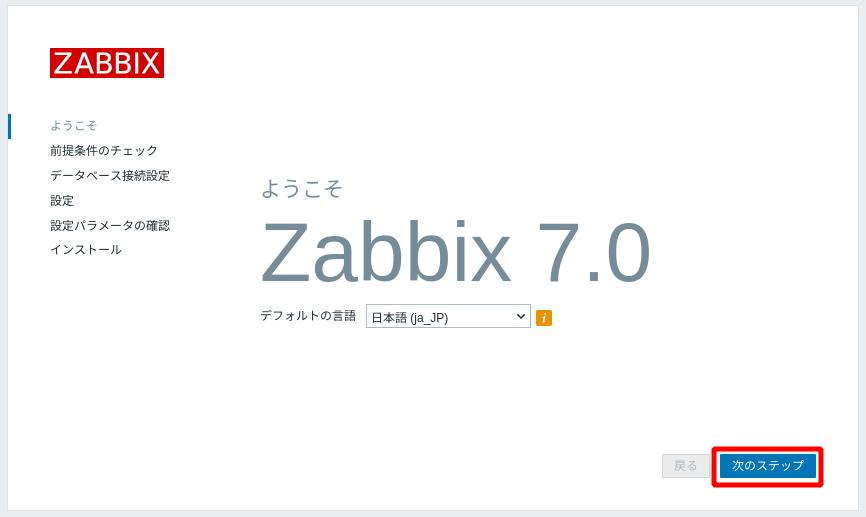
日本人ですので[Japanese]を選択。
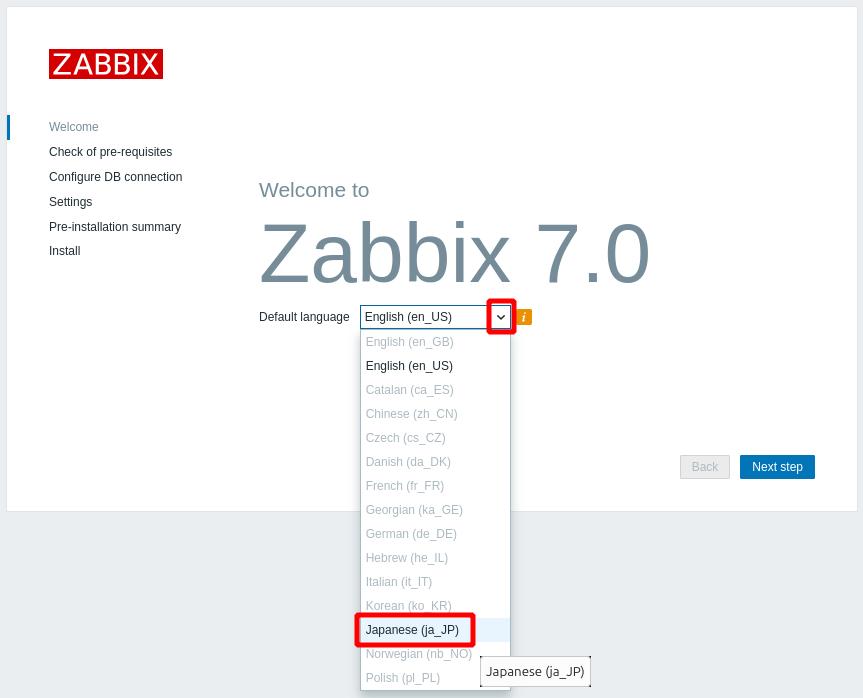
次のステップを押します。
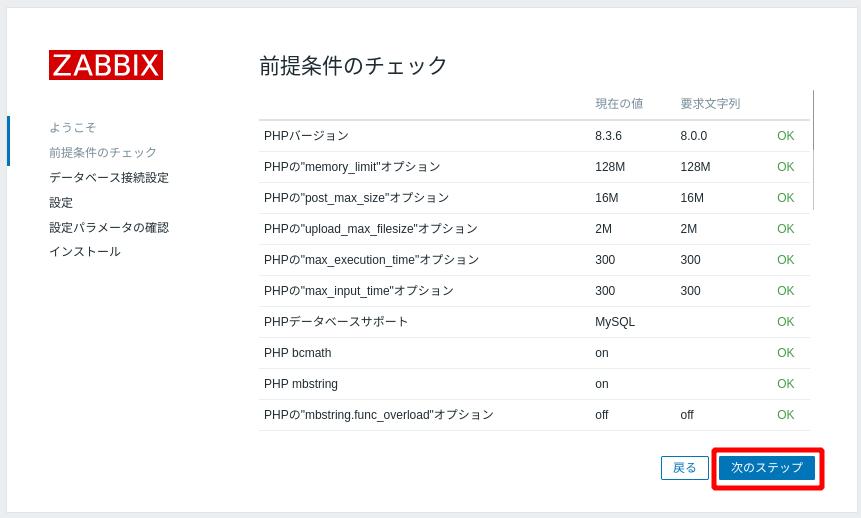
一通り見て次のステップを押します。
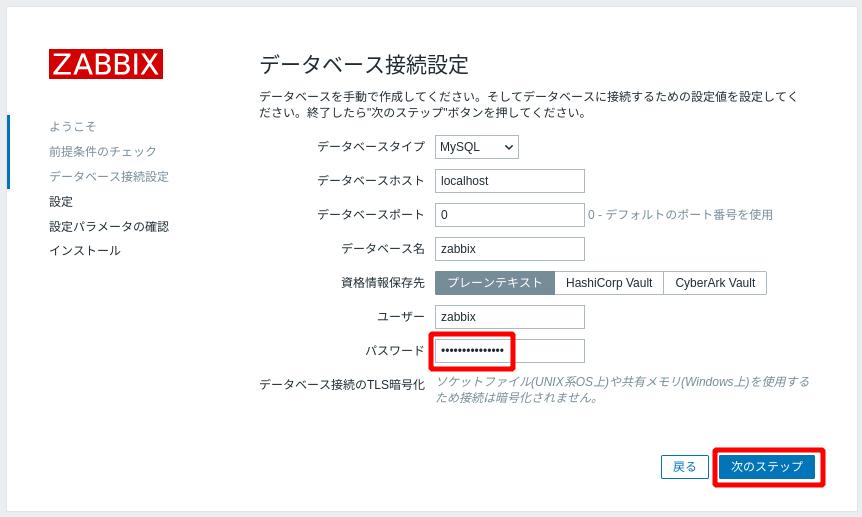
データベースのパスワードは「Subro38Manager-」にしていました。
次のステップを押します。
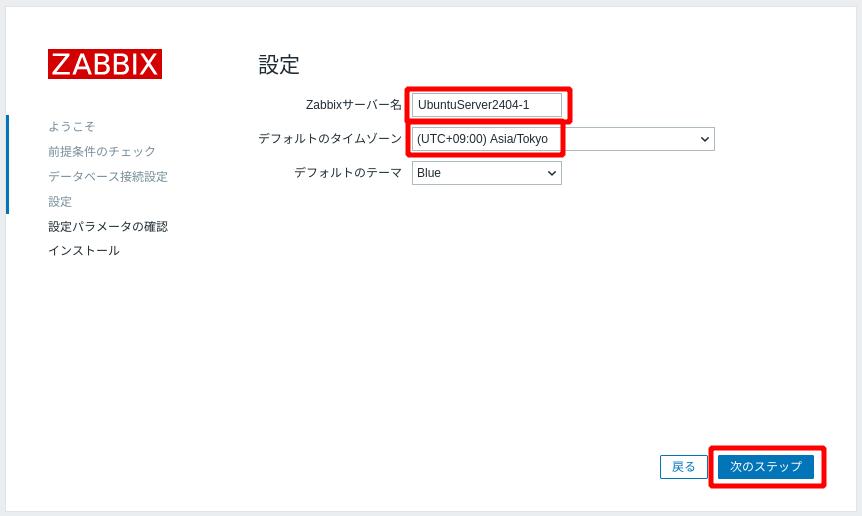
[Zabbixサーバー名]はマシン名のことではなく表面的に出てくるZabbixサーバーの名前なので、任意で好きなものを設定して下さい。
[デフォルトのタイムゾーン]は海外のサーバーやネットワーク機器も監視するなら、UTCにしておくのがよいと思います。
ここでは日本だけという前提で[Asia/Tokyo]にしました。
次のステップを押します。
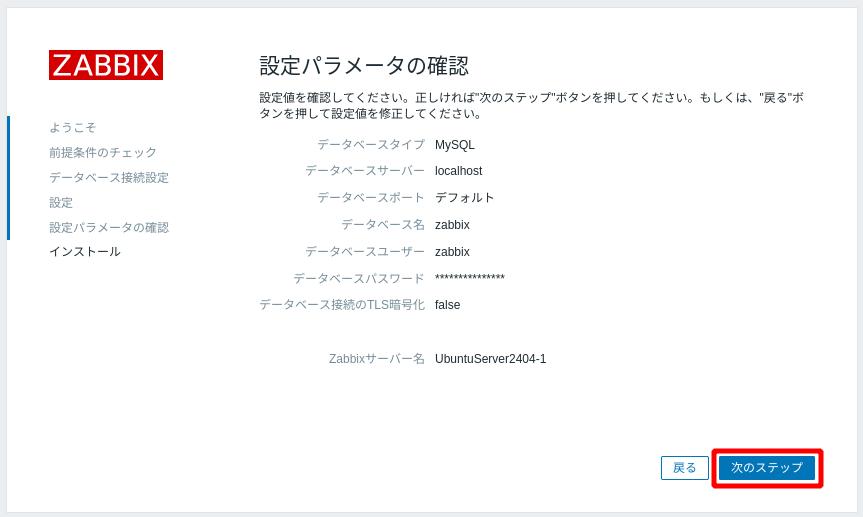
一通り見て次のステップを押します。
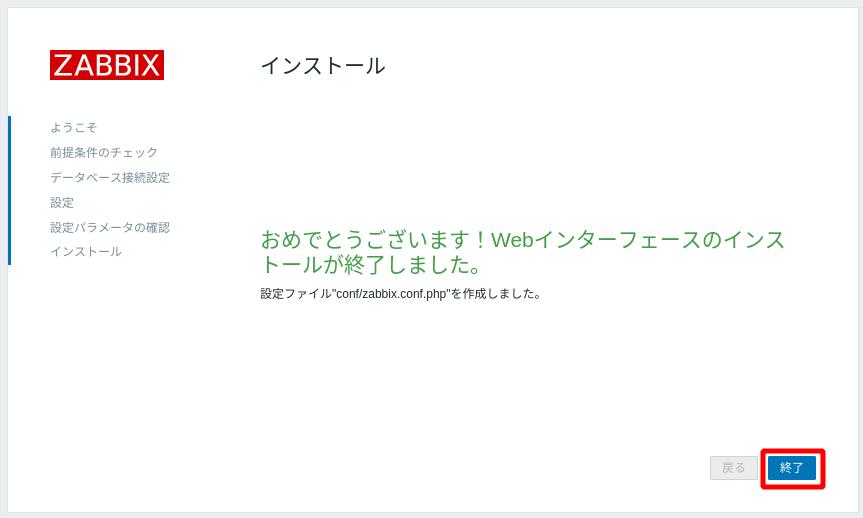
終了を押します。
初期ユーザー/パスワードは、Admin/zabbix になっています。
サインインを押します。
ダッシュボードです。カッコイイ!
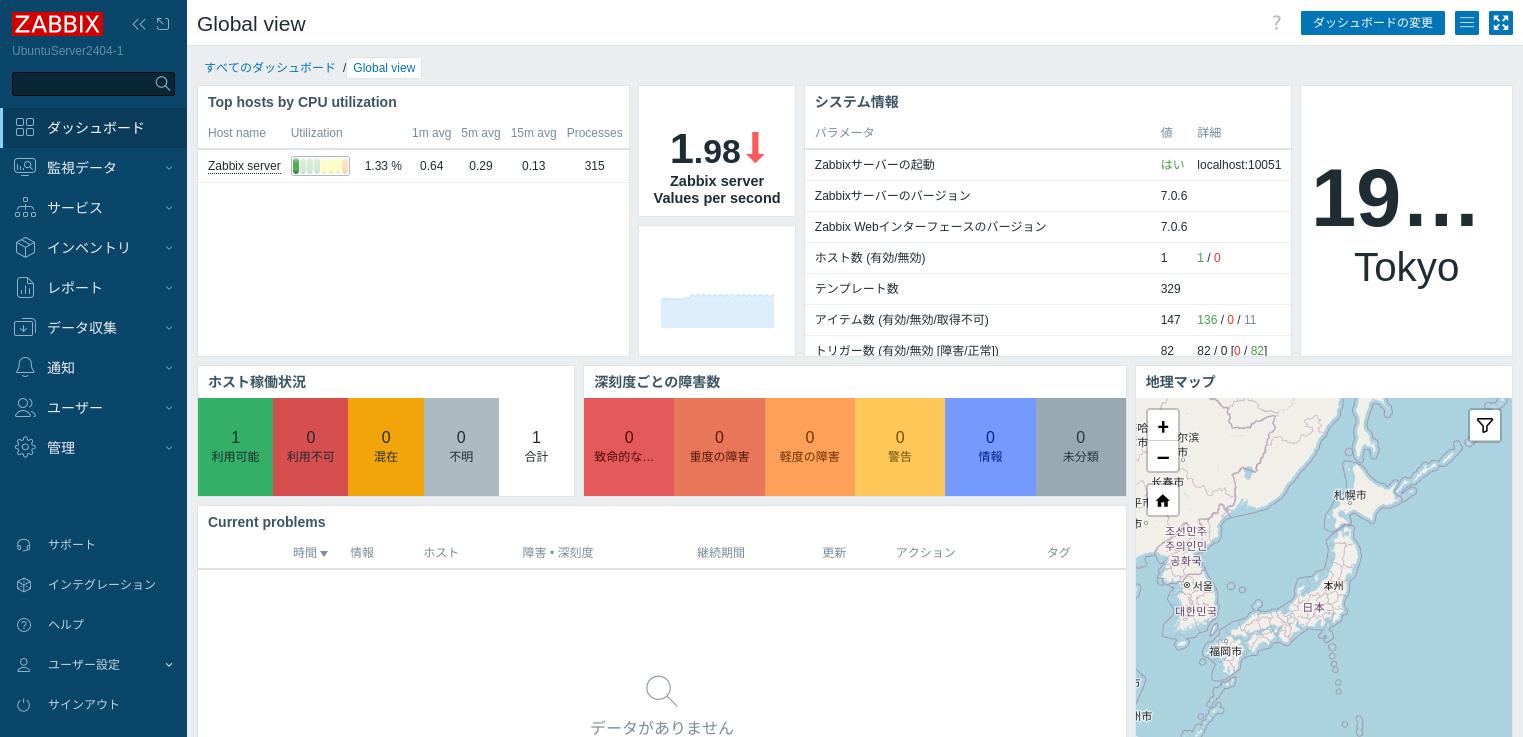
既にこの Zabbixサーバーは監視対象に入っています。
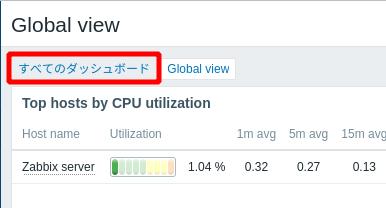
ダッシュボード左上の方にある [すべてのダッシュボード] というリンクを踏むと、他のダッシュボードを選択できます。
他に2つあるので見てみて下さい。
インストールはここまでで、次回「Zabbixインストール(後編)」で監視セッティングをしてみます。
比較的新しい日本語書籍はこれだけしかなく、2019年刊なので Ver.7には対応してないですねぇ…

